Lord777
Professional
- Messages
- 2,578
- Reaction score
- 1,532
- Points
- 113
Creation and configuration of an online store for telegram,
You need a windows Dedicated Server (you can use Linux too, but a guide on win)
I advise you to buy here zomro.com. The price is only $ 3 per month.
If you stopped at zomro, register and go to the control panel and click like this

And choose for $ 3. Do not take cheaper, there for linux

Choose 2012 rus as os

Then the payment. And you return again to the virtual servers (on the first screen)
There, wait until the state becomes active. And you go to the post office, there will be data from the Dedicated Server. Well, connect to it.
We go to the RDP, download python And shit, put two checkboxes down there. E̶s̶l̶i̶ ̶n̶e̶ ̶p̶o̶s̶t̶a̶v̶i̶t̶e̶, ̶ ̶u̶ ̶v̶a̶s̶ ̶u̶m̶r̶ё̶t̶ ̶m̶a̶t̶ь (I'm not kidding (!))
And press install now

You are waiting.
As it was established, then take the archive that I threw you (bot (!)). Press LMB once, then c + ctrl (copy), open the RDP and v + ctrl to the desktop of the diode archive!
On the Dedicated File, RMB once to the archive and extract everything. Extract and press win + r, a window opens, enter cmd there.
Now in cmd enter the commands
Everything, dependencies are installed
Now we do everything in the same order as in the screenshot

Now open the config file in the folder on the desktop through notepad and enter the id there, you can get the @getmyid_bot bot and the token. And that's all. Installation completed.

Now reopen cmd and type in
The bot is running, go to the bot (the token of which was used) from the account whose id you wrote down and press / start
Bot setup
First you need to create it. It is created in the father of all bots @BotFather
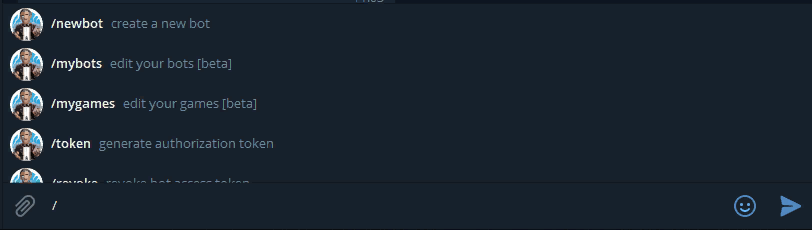
Enter the command / newbot
We write the name there first
Displayed on top

Well, then username must end with bot (or _bot). Displayed there

That's it, the bot has been created. Save the token

Once created, it can (preferably) be customized. Put ava, description, start command.
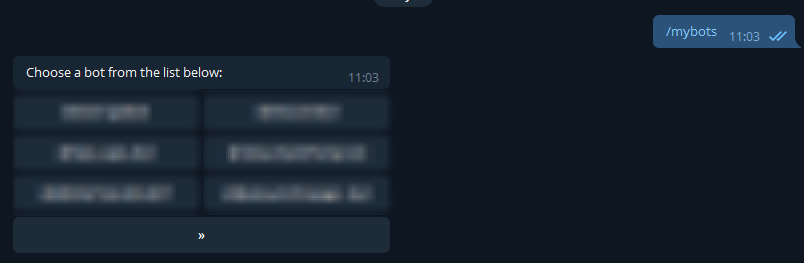
And presses / mybots and your bot will be there
Click on the button with the name of the bot you created and set the ava

Presses Edit bot, Edit botpic and send the bot a photo, which will be on the ava (appear 10 minutes after adding)
Now press Edit commands and paste there
You can change the text, but the / start command should be. You can also add the help command.
Now presses Edit about. And send the text (it will be here)

Then you can change the description that will be located at the first start

Add a description Edit description and write a description.
You need a windows Dedicated Server (you can use Linux too, but a guide on win)
I advise you to buy here zomro.com. The price is only $ 3 per month.
If you stopped at zomro, register and go to the control panel and click like this
And choose for $ 3. Do not take cheaper, there for linux
Choose 2012 rus as os
Then the payment. And you return again to the virtual servers (on the first screen)
There, wait until the state becomes active. And you go to the post office, there will be data from the Dedicated Server. Well, connect to it.
We go to the RDP, download python And shit, put two checkboxes down there. E̶s̶l̶i̶ ̶n̶e̶ ̶p̶o̶s̶t̶a̶v̶i̶t̶e̶, ̶ ̶u̶ ̶v̶a̶s̶ ̶u̶m̶r̶ё̶t̶ ̶m̶a̶t̶ь (I'm not kidding (!))
And press install now
You are waiting.
As it was established, then take the archive that I threw you (bot (!)). Press LMB once, then c + ctrl (copy), open the RDP and v + ctrl to the desktop of the diode archive!
On the Dedicated File, RMB once to the archive and extract everything. Extract and press win + r, a window opens, enter cmd there.
Now in cmd enter the commands
Code:
pip install pytelegrambotapi
pip install coinbase
pip install requests
pip install SimpleQIWI
Everything, dependencies are installed
Now we do everything in the same order as in the screenshot
Now open the config file in the folder on the desktop through notepad and enter the id there, you can get the @getmyid_bot bot and the token. And that's all. Installation completed.
Now reopen cmd and type in
Code:
cd C: \ Users \ Administrator \ Desktop \ shop
py main.py
The bot is running, go to the bot (the token of which was used) from the account whose id you wrote down and press / start
Bot setup
First you need to create it. It is created in the father of all bots @BotFather
Enter the command / newbot
We write the name there first
Displayed on top
Well, then username must end with bot (or _bot). Displayed there
That's it, the bot has been created. Save the token
Once created, it can (preferably) be customized. Put ava, description, start command.
And presses / mybots and your bot will be there
Click on the button with the name of the bot you created and set the ava
Presses Edit bot, Edit botpic and send the bot a photo, which will be on the ava (appear 10 minutes after adding)
Now press Edit commands and paste there
Code:
start - restart the botYou can change the text, but the / start command should be. You can also add the help command.
Now presses Edit about. And send the text (it will be here)
Then you can change the description that will be located at the first start
Add a description Edit description and write a description.
Last edited by a moderator: